Decorate Cookies with Royal Icing Like a Pro
Decorating sugar cookies with royal icing is a rewarding craft that combines baking precision with artistic expression. Many home bakers and professional pastry chefs alike appreciate the versatility of royal icing, which can be piped into intricate outlines, flooded into smooth surfaces, and layered with fine details. The process requires patience, practice, and an understanding of how icing consistency affects the final appearance. Whether you are preparing cookies for a holiday gathering, a bake sale, or simply as a creative outlet, mastering a few foundational techniques can elevate your results.
This article explores the essential methods for outlining, flooding, and adding details to sugar cookies using royal icing. It covers the necessary tools, the importance of achieving the right consistency, step-by-step approaches, and common troubleshooting tips. The focus is on providing a clear, process-oriented overview that you can adapt to your own kitchen environment. By the end, you will have a solid framework for approaching cookie decorating with confidence and consistency.
While the techniques described here are widely used, outcomes can vary based on factors such as humidity, ingredient freshness, and individual skill level. Therefore, treat this information as a guide rather than a strict formula. With practice and attention to detail, you can develop a personal approach that works well for your specific conditions and preferences.
Understanding Royal Icing and Its Role in Cookie Decorating
Royal icing is a mixture typically made from egg whites or meringue powder, powdered sugar, and water or flavor extracts. Its ability to dry hard and smooth makes it ideal for decorating cookies that need to be stacked or packaged. Unlike buttercream or fondant, royal icing can be piped into very fine lines and flooded into large areas without losing its shape. This dual nature allows for both precise outlining and seamless filling, which are the cornerstones of professional-looking cookies.
The consistency of royal icing is arguably the most critical factor in successful decorating. If the icing is too thick, it will not flow smoothly when flooding, leading to uneven surfaces and visible piping lines. If it is too thin, it may run off the cookie or fail to hold its shape when outlining. Achieving the right consistency often involves adjusting with small amounts of water or powdered sugar until the icing forms a smooth, ribbon-like trail when lifted with a spoon. Many decorators prepare multiple consistencies from a single batch: a stiffer version for outlining and details, and a thinner version for flooding.
In addition to consistency, color management plays a significant role. Gel food coloring is generally preferred over liquid coloring because it does not alter the icing’s consistency as much. It is advisable to mix colors separately in small bowls and to prepare more icing than you think you need, as matching colors later can be challenging. For those who are new to decorating, starting with a limited palette of two or three colors can simplify the process and help focus on technique rather than color mixing.
Essential Tools and Preparations
Before beginning any decorating project, gathering the right tools and preparing your workspace can streamline the process. Piping bags, couplers, and tips are fundamental; a small round tip (such as Wilton #2 or #3) is commonly used for outlining, while a slightly larger tip may be used for flooding. Squeeze bottles are an alternative for flooding and can be easier to handle for beginners. Other useful items include toothpicks for popping air bubbles, a scribe tool or needle for dragging icing, and a turntable for rotating cookies as you work.
Preparing the cookies themselves is equally important. Sugar cookies should be completely cool before decorating, and their surface should be free of crumbs. Some decorators apply a thin layer of corn syrup or a base coat of icing to create a smoother canvas, but this is optional. It is also helpful to outline your design on paper first, especially if you plan to add intricate details. This planning stage can reduce hesitation and improve the flow of your piping.
Organizing your workspace with all tools within reach, and covering unused icing with plastic wrap to prevent drying, can make the session more efficient. Royal icing dries quickly when exposed to air, so keeping bowls covered and bags sealed when not in use is a practical habit. Additionally, working in a well-lit area with a comfortable chair can reduce fatigue during longer decorating sessions.
Outlining Techniques for Clean Edges
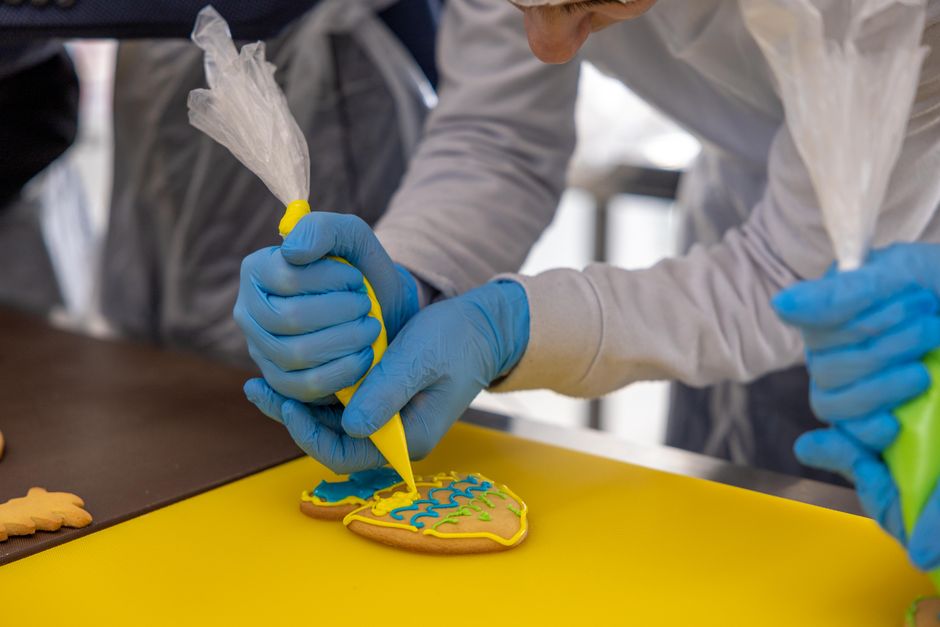
Outlining is the first step in creating a defined shape on your cookie. Using a stiffer consistency of royal icing, pipe a continuous line just inside the edge of the cookie. This border acts as a dam that prevents the flooded icing from spilling over. The key is to maintain steady pressure and a consistent speed; if you pause too long, the icing may bulge, and if you go too fast, the line may break. Practicing on parchment paper or a flat surface can help you develop a feel for the pressure and movement.
When outlining, it is common to start at a point where a corner or curve will be, as this makes it easier to hide the starting and ending points. If the line breaks or you make a mistake, you can use a toothpick to blend the icing or wait for it to dry slightly and then cover it with a new line. Some decorators prefer to outline all cookies first and then flood them in a separate session, allowing the outlines to set before adding the flood icing. This approach can reduce the risk of accidental smudging.
The thickness of the outline can vary based on the design. For a delicate look, a #1 or #2 tip works well; for a bolder edge, a #3 or #4 tip may be used. The choice also depends on the size of the cookie: larger cookies can accommodate thicker outlines without appearing heavy. Experimenting with different tip sizes on a few test cookies can help you determine what works best for your project.
Flooding for Smooth, Professional Surfaces
Flooding involves filling the outlined area with a thinner consistency of royal icing to create a smooth, flat surface. The goal is to achieve a uniform layer that dries to a matte or glossy finish, depending on the recipe. To flood, you can use a piping bag, a squeeze bottle, or a small spoon. The technique is to apply the icing in a zigzag pattern within the outline, then use a toothpick or a scribe tool to spread it evenly and pop any air bubbles.
One common method is the “wet-on-wet” technique, where you flood one color and immediately add dots or lines of another color, then drag a toothpick through them to create patterns such as hearts or flowers. This technique requires both icings to be of flooding consistency and to be applied quickly before the base sets. Another approach is to flood with a single color and allow it to dry completely before adding details, which provides more control and is often easier for beginners.
The drying time for flooded cookies can range from several hours to overnight, depending on humidity and the thickness of the icing. Placing cookies in front of a fan or in a dehydrator set to a low temperature can speed up the process, but care must be taken not to crack the icing. Once dry, the surface is hard and can be stacked or packaged. It is important to note that royal icing can be sensitive to moisture, so storing decorated cookies in an airtight container is advisable.
Adding Details and Finishing Touches
After the flooded base has dried, you can add details using a stiffer icing and a fine tip. This stage is where personal creativity shines, as you can pipe dots, lines, letters, or small motifs. For fine lines, a #0 or #00 tip may be used, while small dots can be made with a #1 or #2 tip. It is helpful to practice on a separate surface before applying details to the cookie, as the icing can be difficult to remove once it sets.
Another popular technique is to use royal icing transfers. This involves piping shapes or patterns onto parchment paper, allowing them to dry, and then peeling them off to place on the cookie. Transfers are useful for creating symmetrical elements or for adding three-dimensional accents. They can be made in advance and stored in an airtight container for weeks, which can be a time-saver for complex designs.
For a final touch, consider adding edible luster dust, sprinkles, or sanding sugar. These should be applied while the icing is still slightly tacky so they adhere properly. However, it is important to note that some decorations may bleed or dissolve over time, so testing on a sample cookie is recommended. The overall appearance of your decorated cookies will depend on the combination of techniques, the quality of your ingredients, and the conditions in your kitchen. With practice, you can develop a workflow that yields consistent and pleasing results.